-1771324320.jpg)
Starlink Installation on Roof in Kenya
BackStarlink Installation on Roof in Kenya: The Ultimate Safe & Professional Guide
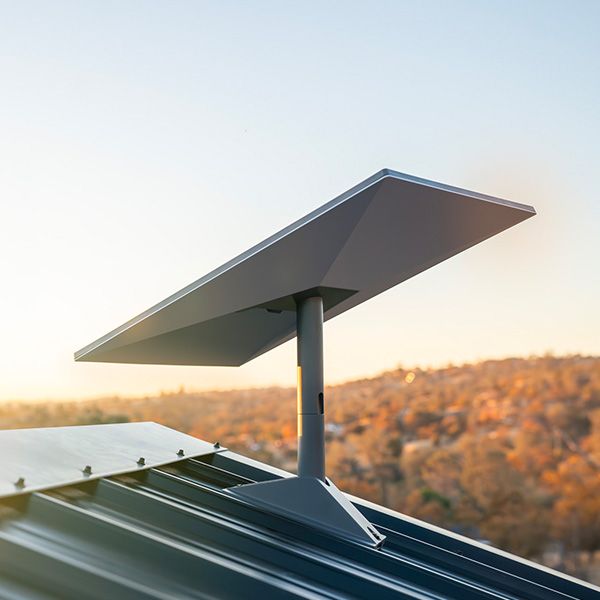
Starlink is growing fast in Kenya because it delivers reliable high-speed internet where fiber is unavailable, unstable, or too costly. Homes, businesses, schools, and remote sites are adopting it for work, learning, streaming, and daily connectivity without waiting months for infrastructure rollout. Its quick deployment and consistent performance are making it a mainstream internet solution across urban and rural areas.
Roof mounting is the best way to maximize Starlink performance because it gives the dish a clear view of the sky. Elevating the system reduces obstructions from trees and buildings, improves stability, and minimizes signal dropouts. A properly installed rooftop setup also protects the equipment from interference and accidental damage.
Starlink performs best when roof installation is done correctly with secure mounting and safe cable routing. Professional setup ensures long-term durability, cleaner performance, and protection against Kenya’s harsh weather. A well-executed rooftop installation turns Starlink into a dependable, long-term connectivity solution.
1. Why Roof Installation Is Ideal for Starlink

Installing Starlink on a roof is widely considered the gold standard setup because the system depends heavily on an uninterrupted line of sight to the sky. Unlike traditional satellite dishes that point in one direction, Starlink constantly communicates with moving satellites. That means even small obstructions—like a tree branch, water tank, neighboring building, or metal structure—can interrupt service for a few seconds at a time. Those interruptions may seem small, but during video calls, online gaming, cloud backups, or business operations, they become noticeable. A properly mounted roof installation minimizes these risks and allows the dish to operate in the cleanest signal environment possible.
1.1 Clear Satellite Visibility Advantages
The biggest advantage of roof installation is simple: height equals visibility. When the Starlink dish is elevated above ground-level obstacles, it gains a wider and clearer view of the sky. Most compounds in Kenya have perimeter walls, trees, rooftop water tanks, solar panels, or nearby structures that block signal paths. Even partial obstructions can cause momentary dropouts as satellites pass behind them.
A roof installation gives the dish the best possible “sky exposure,” reducing obstruction time to near zero when positioned correctly. This is especially important in dense neighborhoods where buildings sit close together. The higher mounting position allows Starlink to maintain continuous satellite tracking, which translates into smoother internet performance and fewer interruptions.
1.2 Improved Speed and Stability
Starlink speeds are influenced by how consistently the dish maintains contact with satellites. When obstructions interrupt the signal, the system must reconnect, which can cause small speed dips or latency spikes. A roof-mounted dish reduces these interruptions dramatically, creating a more stable connection.
For everyday users, this stability means clearer video calls, faster streaming, and more reliable downloads. For businesses, it means fewer disruptions to payment systems, cloud applications, and remote work tools. In professional environments where uptime matters, roof installation directly supports performance consistency. It doesn’t magically increase the maximum speed of Starlink—but it helps you experience the speeds you’re already paying for more reliably.
1.3 Fewer Signal Obstructions
Ground-level installations face constant risks of obstruction. Trees grow, new buildings go up, vehicles park in different positions, and even seasonal foliage changes can affect signal paths. A dish mounted too low may work fine today but degrade over time as the environment changes.
Roof mounting future-proofs your installation. By placing the dish above most obstacles, you reduce the chance that everyday changes in your surroundings will impact connectivity. It also protects the equipment from accidental interference—children playing, pets, maintenance workers, or construction activity. A roof location creates a dedicated, controlled space where the dish can operate without unexpected blockages.
1.4 Works in Cities and Rural Areas
One of the strengths of roof installation is that it works equally well across Kenya’s diverse environments. In urban areas, rooftops help overcome tight building spacing and crowded skylines. Apartments, townhouses, and commercial buildings benefit from elevated mounting that clears neighboring structures.
Roof installation is not just a preference—it is often the smartest technical decision for maximizing Starlink performance in Kenya. By elevating the dish above obstructions, users gain clearer satellite visibility, more stable speeds, and long-term reliability that ground setups struggle to match. Whether you live in a dense city neighborhood or a remote rural area, mounting Starlink on the roof creates the clean signal environment the system was designed for. When done correctly and securely, a roof installation protects your investment and ensures you enjoy consistent, high-quality internet for years to come.
2. Roof Requirements Before Installing Starlink

Before installing Starlink on any roof in Kenya, it’s important to understand that not all rooftops are automatically ready for mounting. A successful installation depends on structural strength, available space, mounting compatibility, and safe cable routing. Skipping this assessment can lead to weak mounting, signal problems, leaks, or long-term damage to the building. Proper planning ensures the dish remains secure during heavy rains, strong winds, and high rooftop temperatures that are common in many parts of Kenya. A professional installer evaluates the roof as part of the installation process to make sure performance and safety are never compromised.
2.1 Suitable Roof Types
Starlink can be installed on most roof types, but each surface requires a different mounting approach. Concrete slab roofs are often the easiest because they provide a stable, flat surface that can support secure mounts without structural risk. Tile roofs require careful mounting to avoid cracking tiles or creating water entry points. Metal sheet roofs are common in Kenya and work well when reinforced mounts are used to distribute weight and resist wind movement. Thatched or temporary roofing structures are generally unsuitable because they lack the structural strength needed to hold the dish safely over time.
The key factor is stability. The roof must support both the weight of the dish and the force of wind pressure. Even though Starlink hardware is lightweight, wind uplift can place significant stress on mounting points. A proper assessment ensures the roof structure can handle this load without loosening or damage.
2.2 Mounting Space and Angles
Starlink dishes automatically adjust to track satellites, but they still need enough open space to operate freely. The installation area must allow a wide sky view without overhanging trees, walls, or rooftop equipment like tanks and solar panels. Installers look for the highest practical point on the roof that offers unobstructed exposure.
Angle matters as well. While Starlink self-orients electronically, the mounting surface must be level and stable to allow accurate movement. Uneven or sloped surfaces may require leveling brackets. The dish should also be positioned where future obstructions are unlikely—meaning installers consider tree growth and planned construction nearby. Good placement today prevents performance problems months or years later.
2.3 Hardware Requirements
Using the correct mounting hardware is critical for long-term safety. Starlink mounts must resist wind, vibration, rain, and heat. In Kenya’s climate, hardware should be corrosion-resistant to prevent rust and weakening over time. Professional installations typically use reinforced mounts, anchor bolts, weatherproof sealants, and cable protection fittings designed for outdoor use.
Improvised mounting solutions may work temporarily but often fail under environmental stress. Loose mounts can shift alignment, causing signal instability. In extreme cases, poorly secured dishes can detach during storms. Investing in proper hardware protects both the equipment and the building.
2.4 Safe Cable Routing
Cable routing is one of the most overlooked parts of installation, yet it has major safety implications. The Starlink cable must travel from the roof into the building without creating water leaks, electrical hazards, or physical damage. Proper routing includes sealed entry points, protective conduit, and strain relief to prevent tension on connectors.
A strong Starlink roof installation starts with the right foundation: a suitable roof surface, proper space and angle planning, professional-grade hardware, and safe cable routing. Ignoring these requirements can lead to performance issues, safety risks, and costly repairs. When the roof is assessed correctly and installation standards are followed, the system becomes stable, weather-resistant, and built to last. Taking the time to meet these requirements ensures that Starlink performs reliably in Kenya’s demanding conditions and protects your investment for years to come.
3. Types of Starlink Roof Mounts Available

Choosing the right roof mount is just as important as choosing the installation location. Different buildings, roof materials, and usage needs require different mounting solutions. A mount that works perfectly on a concrete rooftop may be unsafe on a metal sheet roof, while a temporary setup for a rental property may require a non-invasive option. The goal of any mount is the same: keep the Starlink dish stable, aligned, weather-resistant, and secure against wind. Understanding the available mount types helps homeowners and businesses in Kenya select a solution that balances safety, durability, and flexibility.
3.1 Standard Roof Mounts
Standard roof mounts are the most common and permanent installation option. These mounts are anchored directly into the roof structure using heavy-duty bolts and weather-sealed fittings. They provide maximum stability and are ideal for long-term installations where the dish is expected to remain in place for years.
This type of mount is best suited for concrete roofs or reinforced structural surfaces that can handle anchoring without weakening the building. Standard mounts are highly wind-resistant and perform well in Kenya’s stormy seasons. When installed properly with waterproof sealing, they do not cause leaks and offer the strongest possible support for the dish.
3.2 Non-Penetrating Mounts
Non-penetrating mounts are designed for situations where drilling into the roof is not allowed or not desirable. Instead of anchoring into the structure, these mounts use weighted bases—often concrete blocks—to hold the dish firmly in place. They are popular for rental properties, commercial buildings, and rooftops where structural modification is restricted.
The advantage is clear: no drilling means no risk of roof damage or water entry. However, proper weight balancing is critical. In high-wind areas, insufficient ballast can cause shifting. Professional installers calculate the correct weight needed to keep the mount secure while protecting the roof surface underneath.
3.3 Pole Extension Mounts
Pole extension mounts elevate the dish above the roofline using a vertical mast. This option is ideal when the roof itself has partial obstructions, such as water tanks, railings, solar panels, or nearby trees. By raising the dish higher, pole mounts create a clearer line of sight to the sky.
These mounts are especially useful in dense urban environments where neighboring buildings block signal paths. The extra height improves satellite tracking and reduces obstruction time. Pole mounts must be reinforced properly because taller structures experience stronger wind forces. When installed professionally, they provide both elevation and stability.
3.4 Temporary or Magnetic Options
Temporary or magnetic mounts are designed for short-term or mobile installations. These are common in field operations, construction sites, travel setups, and emergency deployments. They allow quick placement and removal without permanent modification.
Each Starlink roof mount type serves a different purpose, and the best choice depends on the building structure, installation goals, and long-term plans. Standard mounts offer maximum strength for permanent setups, non-penetrating mounts protect rental and sensitive roofs, pole extensions improve visibility in obstructed areas, and temporary options support mobile use. Selecting the right mount ensures the dish remains stable, aligned, and protected from weather. A properly chosen mounting solution is a critical step toward achieving consistent Starlink performance and long-lasting installation safety in Kenya.
4. Step-by-Step Installation Process

A successful Starlink roof installation follows a structured process rather than guesswork. Each step builds on the previous one to ensure the dish operates in the best possible conditions while remaining safe and secure. Skipping steps or rushing the process often leads to signal interruptions, weak mounting, or long-term maintenance problems. In Kenya’s environment—where wind, rain, and heat can stress rooftop equipment—a disciplined installation method is essential. A professional workflow ensures both performance and durability from day one.
4.1 Site Inspection and Obstruction Scan
The installation always begins with a full site inspection. This step determines the best mounting location by evaluating the roof layout, surrounding structures, and potential signal blockers. Installers use the Starlink obstruction scanning tools to simulate the dish’s field of view and identify areas where satellites may be blocked.
Even small obstructions matter. Trees, neighboring buildings, rooftop tanks, antennas, and walls can cause intermittent dropouts. The inspection looks not only at current obstacles but also future risks such as tree growth or planned construction. Choosing the right location at this stage prevents performance issues later. A careful inspection is the foundation of a reliable installation.
4.2 Mount Positioning
Once the ideal spot is selected, the mount is positioned and secured. This step focuses on structural strength and stability. The mount must sit on a surface capable of handling wind pressure and long-term exposure to weather. Installers ensure the mount is level and anchored properly so the dish can move and self-orient without stress.
Weather sealing is applied during this stage to prevent leaks. On penetrated mounts, waterproof sealants protect the roof from rain damage. For non-penetrating mounts, weight distribution is adjusted to avoid shifting. Proper mount positioning guarantees that the dish remains steady even during storms.
4.3 Dish Alignment
After mounting, the Starlink dish is attached and allowed to self-align. Unlike traditional satellite dishes that require manual aiming, Starlink uses automated positioning. However, correct base alignment still matters. The dish must start from a stable, level platform so its motors can operate accurately.
Installers confirm that the dish has full range of motion and no nearby objects interfere with its movement. They monitor the system’s initial connection phase to verify that satellite tracking is smooth. A properly aligned dish ensures minimal obstruction time and consistent performance.
4.4 Cable Protection
With the dish active, attention shifts to cable routing. The cable must be protected from weather, friction, and accidental damage. Installers use protective conduit and secure fasteners to keep the cable stable along the roof and walls. Entry points into the building are sealed to prevent water intrusion.
Inside the structure, cables are routed cleanly to avoid tripping hazards or electrical interference. Strain relief is added so connectors are not pulled or stressed. Good cable protection extends the life of the equipment and prevents service interruptions caused by wear or exposure.
4.5 System Testing
The final step is a complete system test. Installers verify signal quality, obstruction levels, speed stability, and router performance. They confirm that the dish maintains a steady connection and that indoor networking works as expected. Testing also includes checking cable integrity and mount stability one last time.
A proper Starlink roof installation is a sequence of deliberate, professional steps—inspection, mounting, alignment, protection, and testing. Each phase plays a critical role in ensuring the system performs reliably under Kenya’s demanding weather conditions. When the process is followed carefully, the result is a secure installation that delivers stable internet with minimal interruptions. A disciplined step-by-step approach protects both the equipment and the building, turning Starlink into a long-term connectivity solution rather than a temporary experiment.
5. Roof Installation Safety Guidelines

Roof installation is not just a technical task—it’s a safety-critical operation. Working at height introduces real risks, and Starlink installation should never compromise personal safety or the integrity of the building. In Kenya, rooftops are exposed to intense sun, slippery rain conditions, strong winds, and uneven surfaces that increase the chance of accidents. A safe installation protects the installer, the property, and the equipment. Following strict safety guidelines ensures the job is completed without injury, structural damage, or electrical hazards.
5.1 Working at Height Precautions
Any work done on a roof requires proper fall prevention measures. Installers should use stable ladders secured at the base and top, and they should never climb in wet or unstable footwear. Non-slip shoes, safety harnesses where necessary, and controlled movement are essential. Rushing on a roof is one of the most common causes of accidents.
The work area should remain clear of loose tools and cables that could create tripping hazards. A second person should always be present on the ground to stabilize ladders, pass equipment, and respond in case of emergency. Roof installation should never be treated as a one-person shortcut job.
5.2 Weather Safety
Weather conditions play a major role in rooftop safety. Installations should be avoided during rain, storms, or strong winds. Wet roofing materials become slippery, dramatically increasing fall risk. Wind can destabilize both the installer and the dish during mounting, leading to injury or equipment damage.
Kenya’s midday heat is another overlooked hazard. Prolonged exposure on rooftops can cause dehydration or heat exhaustion. Installers should schedule work during cooler hours, take breaks, and stay hydrated. Safe timing is part of safe installation.
5.3 Roof Protection
A safe installation protects not only people but also the building. Drilling or anchoring must be done carefully to avoid structural weakening or water leaks. Installers should use proper mounting points and weatherproof sealing materials to maintain roof integrity.
Walking on fragile surfaces like tiles, skylights, or aging metal sheets requires caution. Excessive pressure in the wrong place can cause cracks or collapse. Professional installers distribute weight properly and avoid stepping on weak areas. Protecting the roof ensures the installation does not create hidden long-term damage.
5.4 Electrical Safety
Starlink equipment involves power components that must be handled responsibly. Cables should never run near exposed wiring or overloaded electrical systems. Installers should verify that indoor power outlets are grounded and safe before connecting equipment.
Roof installation safety is about preparation, discipline, and respect for risk. Proper height precautions, weather awareness, roof protection, and electrical safety measures turn a dangerous task into a controlled professional operation. Ignoring safety shortcuts may save minutes but can lead to injuries, property damage, or equipment failure. A safe Starlink installation ensures that the system delivers reliable internet without putting people or buildings at risk, making safety an essential part of every successful rooftop setup.
6. Common Installation Mistakes to Avoid

Even high-quality equipment like Starlink can underperform if installation mistakes are made. Many connection problems blamed on the network are actually caused by poor mounting, positioning, or cable handling. These mistakes are often avoidable with proper planning and professional standards. In Kenya, where rooftops face strong wind, heavy rain, dust, and heat, small installation errors can quickly grow into major performance or safety issues. Understanding the most common mistakes helps ensure the system works as intended from the beginning.
6.1 Incorrect Dish Alignment
Although Starlink dishes self-orient automatically, the base installation must still be correct. If the mount is uneven or unstable, the dish cannot move freely to track satellites. This results in repeated micro-disruptions that show up as lag, buffering, or dropped connections.
Another common mistake is placing the dish too close to walls or rooftop structures that limit its movement range. Even partial restriction can affect satellite tracking. A proper installation gives the dish full 360° clearance and a level mounting surface so its motors can operate smoothly.
6.2 Weak Mounting
A weak mount is one of the most dangerous installation errors. If the mount shifts, tilts, or loosens over time, the dish alignment changes and performance drops. In severe cases, strong wind can detach poorly secured equipment, risking property damage or injury.
Some installers underestimate wind force on rooftops. Even lightweight hardware experiences strong uplift pressure during storms. Professional mounting requires reinforced anchors, correct torque tightening, and weatherproof sealing. Stability is not optional—it is essential for both safety and signal reliability.
6.3 Exposed Cables
Leaving cables exposed to weather and friction shortens their lifespan dramatically. Sunlight, rain, dust, and physical stress can degrade cable insulation, leading to signal loss or electrical risk. Animals, especially birds and rodents, may also damage unprotected wiring.
Proper installations use protective conduit, secure fasteners, and sealed entry points. Cables should never hang loosely or drag across sharp edges. Clean routing prevents long-term service interruptions and avoids costly repairs.
6.4 Obstructed Positioning
Installing the dish in a location with partial obstructions is a frequent performance killer. Trees, tanks, chimneys, neighboring buildings, or even decorative roof structures can block satellite paths. These obstructions may not seem significant during installation but cause recurring dropouts once the system is active.
Most Starlink problems are not technology failures—they are installation mistakes. Incorrect alignment, weak mounting, exposed cables, and obstructed positioning all reduce performance and increase risk. Avoiding these errors ensures the dish remains stable, protected, and free to communicate with satellites without interruption. A careful, professional installation eliminates guesswork and turns Starlink into a dependable long-term internet solution rather than a constant troubleshooting project.
7. Professional vs DIY Installation

One of the biggest decisions Starlink users face is whether to install the system themselves or hire professionals. While Starlink is marketed as user-friendly, roof installations are not the same as placing a router on a table. They involve structural mounting, height safety, cable routing, and long-term durability considerations. A DIY approach may seem cheaper at first, but installation quality directly affects performance, safety, and lifespan. Understanding the difference between self-installation and expert installation helps users make a decision that protects both their equipment and their property.
7.1 Risks of Self-Installation
Self-installation carries several hidden risks. The most obvious is safety: working at height without proper equipment increases the chance of falls and injuries. Many DIY installers underestimate roof hazards, especially during windy or wet conditions.
There is also the risk of improper mounting. Weak anchoring can cause the dish to shift or detach during storms. Incorrect cable routing may create leaks or electrical hazards. Even small alignment mistakes can lead to frequent signal interruptions that are difficult to diagnose later. What looks like a simple setup can turn into repeated troubleshooting and costly repairs.
7.2 Benefits of Experts
Professional installers bring experience, tools, and installation standards that DIY setups rarely match. They conduct obstruction scans, choose the strongest mounting points, weatherproof all penetrations, and route cables cleanly and safely. Their goal is not just to “make it work,” but to build an installation that survives years of exposure to Kenya’s climate.
Experts also work efficiently. A job that might take a homeowner an entire weekend can often be completed in a few hours with professional precision. More importantly, professional installation reduces guesswork. The system is optimized from day one, saving time, frustration, and future service calls.
7.3 Warranty Protection
Improper installation can void warranties or complicate support claims. If equipment fails and the installation shows signs of misuse or unsafe mounting, warranty coverage may be questioned. Professional installation provides documented proof that the system was set up correctly according to safety standards.
This protection matters when dealing with expensive equipment. A warranty is only valuable if it remains valid. Professional installers help preserve that protection by ensuring the system meets installation guidelines.
7.4 Long-Term Reliability
Starlink is designed to operate for years outdoors, but long-term reliability depends heavily on installation quality. A secure mount, protected cable, and optimal positioning reduce wear and environmental stress. DIY setups often focus on short-term success—getting online quickly—while overlooking durability.
Choosing between DIY and professional installation is ultimately a decision between short-term savings and long-term reliability. Self-installation may appear convenient, but it carries safety risks, performance uncertainty, and potential warranty complications. Professional installation delivers structural security, optimized performance, and peace of mind. When the goal is stable internet that works consistently year after year, expert installation is not an extra expense—it is an investment in reliability and safety.
8. Installation for Different Property Types

Starlink roof installation is not a one-size-fits-all process. Different property types require different mounting strategies, cable routing plans, and safety considerations. A residential home has different structural needs compared to an apartment building or a commercial office. Remote buildings introduce another layer of complexity due to terrain and power conditions. Understanding how installation varies by property type ensures the system is adapted to its environment rather than forced into a generic setup. Tailoring the installation to the property improves both performance and longevity.
8.1 Homes
Residential homes are typically the simplest environments for Starlink installation. Most standalone houses offer accessible rooftops and enough open sky to achieve a clean signal path. Installers focus on selecting the highest stable point of the roof while keeping cable entry discreet and weatherproof.
Home installations must also consider aesthetics and long-term durability. Clean cable routing along walls, sealed entry points, and low-visibility mounting help preserve the home’s appearance. Safety is especially important in family homes to prevent accidental contact with cables or equipment. A properly installed residential system should feel invisible in daily life—working reliably without drawing attention.
8.2 Apartments
Apartment installations are more complex because they involve shared structures and landlord permissions. Roof access may be restricted, and structural modifications are often regulated. In these cases, non-penetrating mounts or controlled mounting points are preferred to avoid damaging shared property.
Cable routing is another challenge. The installation must travel from the rooftop to the specific unit without interfering with other residents. Professional installers plan discreet routing paths that respect building design and safety codes. Apartment installations succeed when they balance signal performance with respect for shared infrastructure.
8.3 Offices
Office installations prioritize stability and uptime. Businesses depend on continuous connectivity for operations such as payments, cloud software, communications, and security systems. For offices, mounting strength and cable protection are critical because downtime can translate directly into financial loss.
Commercial buildings often have rooftop equipment like HVAC systems, antennas, and solar panels that require careful positioning. Installers must navigate these obstacles while preserving signal clarity. Office installations also benefit from structured indoor networking setups that distribute Starlink connectivity efficiently throughout the workspace.
8.4 Remote Buildings
Remote buildings—such as farms, lodges, clinics, schools, and construction sites—present unique challenges. These locations may lack stable power, accessible rooftops, or reinforced structures. Wind exposure is often higher in open terrain, requiring extra-strong mounting solutions.
Every property type demands a customized approach to Starlink installation. Homes require clean and durable setups, apartments demand structural sensitivity, offices prioritize uptime, and remote buildings need rugged resilience. Treating all installations the same leads to avoidable problems. When the mounting strategy matches the property environment, the result is a stable, safe, and high-performing system that adapts to its surroundings and delivers reliable internet wherever it is installed.
9. Maintenance After Roof Installation

A roof-mounted Starlink system is designed to operate outdoors for years, but no rooftop equipment is completely maintenance-free. Dust, rain, wind, sun exposure, and structural movement can gradually affect hardware over time. Regular maintenance is not about constant repairs—it’s about simple preventive checks that keep the system performing at its best. In Kenya’s varied climate, a small inspection routine can prevent signal interruptions, cable damage, or mounting issues before they become serious problems. A well-maintained installation protects both internet performance and the building itself.
9.1 Routine Inspections
Routine inspections should be done every few months or after extreme weather. The goal is to confirm that the mount remains tight, the dish is stable, and no visible damage has occurred. Strong winds and heavy rain can loosen hardware gradually, even when installed professionally.
An inspection also checks for new obstructions. Trees grow, nearby construction appears, and rooftop changes may affect the dish’s field of view. Early detection allows adjustments before performance drops. These inspections don’t require advanced tools—just a careful visual check from a safe position.
9.2 Cleaning Tips
Starlink dishes are built to withstand weather, but dirt, dust, bird droppings, and debris can accumulate over time. In dry or dusty areas of Kenya, rooftop equipment can collect a noticeable layer of particles that may affect heat dissipation or movement.
Cleaning should be gentle. Use a soft cloth or water rinse—never harsh chemicals or abrasive tools. The dish surface should not be scrubbed aggressively. Safety is critical: cleaning should only be done when the roof is dry and stable, or handled by professionals if access is risky.
9.3 Cable Checks
Cables are often the first components to show wear. Sun exposure, friction, or animal interference can damage insulation over time. Routine checks ensure cables remain secured, protected, and free from cracks or tension stress.
Entry points into the building should also be inspected to confirm weather seals remain intact. A loose cable can lead to water intrusion or connection instability. Early cable maintenance prevents expensive replacements and service interruptions.
9.4 Seasonal Adjustments
Kenya experiences seasonal weather shifts that can impact rooftop equipment. Heavy rains, wind seasons, and extreme heat all place different stress on installations. Seasonal checks confirm that mounts remain tight and cables remain protected.
Maintenance after roof installation is simple but essential. Routine inspections, gentle cleaning, cable protection, and seasonal awareness keep the Starlink system stable and reliable year after year. Ignoring maintenance doesn’t cause immediate failure—but small issues grow quietly until they disrupt service. A proactive maintenance habit preserves performance, protects the roof structure, and ensures that the installation continues delivering strong internet without surprise breakdowns
10. Frequently Asked Questions
Even after understanding the installation process, many users still have practical concerns about roof-mounted Starlink systems. These questions usually revolve around safety, durability, flexibility, and performance. Addressing them clearly helps set realistic expectations and prevents unnecessary fear or misinformation. Below are the most common questions people ask before installing Starlink on a roof in Kenya.
10.1 Can it damage my roof?
A properly installed Starlink system should not damage your roof. Professional installers use controlled mounting methods and weatherproof sealing to prevent leaks or structural stress. The risk comes from poor installation—not from the equipment itself. When mounts are anchored correctly and sealed with appropriate materials, the roof remains protected against water intrusion and long-term wear.
Problems occur when shortcuts are taken, such as drilling without sealing or mounting on weak surfaces. With professional standards, the installation becomes part of the roof structure safely rather than a threat to it.
10.2 Does weather affect performance?
Starlink is engineered to operate in tough weather conditions, including heavy rain and wind. In Kenya, storms may cause brief performance dips during extreme rainfall, but service typically stabilizes quickly. A roof-mounted dish actually performs better in weather than low installations because it avoids ground-level obstructions and interference.
The bigger concern is mounting strength, not signal failure. A secure installation ensures the dish remains aligned even during strong winds. Weather resilience depends more on installation quality than on the technology itself.
10.3 How long does installation take?
A standard professional roof installation usually takes a few hours. The exact time depends on roof accessibility, cable routing complexity, and mounting requirements. Simple home installations may be completed quickly, while apartment or commercial setups may require additional planning.
Rushing installation is never recommended. The goal is not speed—it’s correctness. Taking time to inspect, mount securely, and test thoroughly prevents future problems.
10.4 Can I move it later?
Yes, Starlink systems can be relocated. The dish is not permanently locked to one location. However, moving a roof installation requires remounting and cable re-routing, which should be done carefully to avoid damage.
If relocation is planned frequently—such as for temporary sites or rentals—non-penetrating mounts may be a better choice. Professional handling during relocation ensures the system remains safe and functional.
10.5 Is professional installation required?
Starlink does not legally require professional installation, but roof installations strongly benefit from expert handling. The risks of working at height, incorrect mounting, and cable damage make DIY setups more dangerous than they appear.
Most concerns about Starlink roof installation come down to safety, durability, and performance—and all three are controlled by installation quality. When mounted correctly, Starlink does not damage roofs, handles weather well, installs efficiently, and can be relocated if needed. Professional installation is not about complexity; it’s about reducing risk and maximizing reliability. Clear answers to these common questions show that a well-executed roof installation is safe, practical, and built for long-term use in Kenya’s environment.
Get the Best Starlink Roof Installation in Kenya with Spacelink Kenya

Roof installation remains the smartest way to unlock the full power of Starlink in Kenya. By elevating the dish above everyday obstructions, users gain clearer satellite visibility, more stable speeds, and long-term performance that ground setups rarely match. A properly mounted rooftop system reduces signal interruptions, protects the equipment from accidental damage, and ensures consistent connectivity for homes, offices, and remote sites alike. When installed with the right hardware and positioning, a roof-mounted Starlink setup becomes a durable, weather-resistant solution designed to perform reliably through Kenya’s rain, wind, and heat.
That level of performance, however, depends heavily on expert setup. Professional installation eliminates guesswork by ensuring safe mounting, waterproof sealing, secure cable routing, and precise placement for maximum sky exposure. It also protects your roof structure, preserves warranty coverage, and reduces future maintenance issues. Attempting shortcuts or DIY roof work may seem convenient at first, but the long-term risks—loose mounts, leaks, alignment problems, and safety hazards—often cost far more than doing the job correctly from the beginning. Expert handling turns Starlink from a simple device into a dependable infrastructure investment.
If you want stable, high-performance internet without installation stress, the smartest move is to work with professionals who specialize in rooftop deployments. The team at Spacelink Kenya provides safe, optimized installations designed for Kenyan environments, ensuring your system performs exactly as it should from day one. Whether for a home, business, apartment, or remote location, professional support guarantees peace of mind and long-term reliability. Don’t leave your connectivity to chance—secure expert installation and enjoy Starlink the way it was meant to work.
Table of Contents